
Informations & Wiki
Before you start
Important
-
Use a fast USB flash drive (USB 3.0 or higher) to avoid kernel panic.
-
Arc is a bootloader for Synology DSM that boots from USB or a virtual disk, only boot data is stored on the boot media.
-
The USB stick is required to start DSM!
-
Minimum 4 GB RAM required for both native and VM installations.
-
Upgrading from DSM 6 to DSM 7 may cause issues, use clean disks for DSM 7 due to changed partition layouts and sizes.
-
DSM kernel supports only SATA controllers, not HBA/RAID/etc.
-
For Device Tree (DT) models: SATA and HBA controllers are supported, SCSI/RAID controllers are not supported.
-
For non-DT models: SATA, HBA, RAID, and SCSI controllers may work.
-
-
Arc does not support all hardware – each module/driver must be ported for device compatibility.
Restrictions (All Models)
-
x86-64 / amd64-capable CPU required
-
DHCP server needed (static IP also supported)
-
At least one SATA/SAS drive required for system installation (except SA6400 with nvmesystem add-on)
-
Max 8 drives per storage controller (per PCIe address)
-
Max 26 drives per system
-
Using Arc Patch limits you to one device model per account
Arc Downloads
-
.img – For USB flashing or Proxmox/Unraid
-
.vmdk – VMware ESXi / vSphere
-
.vmdk-dyn – VMware Workstation
-
.ova – Hypervisor template
-
.vhd – Hyper-V (limited support, workaround needed)
Versions
-
Format: x.y.z
-
x = Major release (loader changes)
-
y = Minor release (new features/major changes)
-
z = Micro release (bug fixes)
-
Branches
-
arc – For all supported DSM models.
-
essential – Only for Linux 5.x based DSM models
UEFI/Bios Settings
Important for Native Installation
-
Reset BIOS/UEFI to default settings
-
Set integrated SATA controller to AHCI mode
-
Disable Fast Boot and Quiet Boot
-
Disable Secure Boot
- Disable fTPM
- Disable Trusted Computing
- Disable ASPM
-
Set USB stick as the first boot device
Recommended Settings for Native Installation
-
Use UEFI boot mode (if available)
-
Enable ACPI support (required for CPU frequency scaling), but disable C1E (can cause kernel panic)
-
Set CPU power/performance mode to “OS controlled” (if supported)
Recommended for RAID/HBA Setups
-
Disable the SATA controller if using RAID or HBA and no drives are connected to SATA
Troubleshooting Boot Issues
-
Disable serial console / serial port
-
Disable rBAR
-
Disable SR-IOV
-
Disable x2apic / Extended APIC (if present)
Troubleshooting Virtual Machine Manager (VMM) Issues
-
Enable Vanderpool / SVM / VT-x / AMD-V virtualization extensions
-
You may need to disable Intel VT-d or AMD IOMMU, but this is system-dependent
VM Settings
Supported Hypervisors
- VMware ESXi — Supported (ESXi: 7, 8, 9 and equal Workstation versions)
- QEMU/KVM-based — Supported (Proxmox: 8 – stable, 9 – has trouble with some linux based systems / Unraid 7 – stable)
- XEN-based HV — Not officially supported but may work.
- Hyper-V — Not officially supported. Requires the storage controller to be passed through to the VM.
VM configuration guidelines
- Select UEFI/EFI as the boot environment.
- Arc Loader disk: Attach at SATA 0:0
- Data drives: Attach at SATA 0:1–0:7, SATA x:0–x:7, or SCSI x:0–x:7
- The Loader automatically creates a portmap for Device Tree (DT) models or show a selection for non-DT models.
VMware specific settings
- Select guest OS as Other 4.x Linux (64-bit) or Other 5.x Linux (64-bit) for SA6400 or 25 models
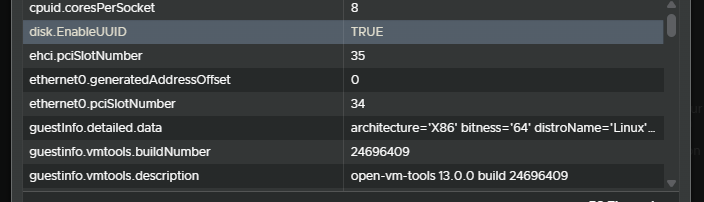
- For LSI Logic SAS you have to set disk.EnableUUID = “TRUE” in VM config file
- For VMM, Containers, Docker: Promiscuous Mode: Accept
- Disable host swap:
- Go to Host > Manage > Swap > Disable
- Use the vmtools addon in Arc Loader or install the community package from DSM Package Center
QEMU Guest Agent (Proxmox/Unraid)
- Use the vmtools addon in Arc Loader or install the community package from DSM Package Center
Proxmox Installation Script
- Use the toolkit by @And-rix on GitHub for easy setup:
curl -fsSL https://pvetoolkit.auxxxilium.tech -o /root/arc-toolkit.sh && chmod +x /root/arc-toolkit.sh
- Execute the script and follow the steps:
/root/arc-toolkit.sh
Use & Update
Using Arc Loader (Arc Config Mode)
Download & Flash
Download the latest Arc Loader image and flash it to a USB stick or a virtual SATA disk (0:0) in your hypervisor. Set your BIOS first boot device to match the boot media.
Display Output
Connect a display to set up the loader. The loader interface will appear automatically.
Web Configuration
Access the web UI at http://IP:7080 for easy loader configuration. It launches automatically on boot.
Web Terminal
Use the web terminal at http://IP:7681 for advanced configuration via browser.
SSH Access
Connect via SSH using:
-
-
User:
root -
Password:
arc
Runarc.shto start configuration.
-
Important Notes
-
The boot device must remain connected for every startup.
Creating your DSM Loader
-
Boot into Arc Config Mode.
-
Select your model and follow the on-screen instructions:
-
Build Loader
-
Boot Loader
-
Updating Arc Loader
-
Best practice: replace the boot image with the latest Arc version (warning: hardware encryption keys will be lost).
-
Alternatively, use the “Update” option in the Arc Config Mode.
-
You can restore your previous configuration, but not all settings may be compatible with new loaders.
-
For details, check
#loader-releasenoteson Discord or GitHub release notes. - If your Loader is lower than 2.5.5, you have to use, configure and boot 2.5.5 first, than you can update to a later version.
DSM Installation
-
DSM installs on all connected disks during initial setup or when creating storage pools.
-
You cannot install DSM on a specific disk if multiple drives are connected.
-
If installation fails, check your portmap configuration (for Non-DT models).
Restarting to Config or Update Mode
-
Arc Config Mode: Run
loader-reboot.sh configvia DSM SSH. -
Arc Update Mode: Run
loader-reboot.sh updatevia DSM SSH.
DSM Updates
-
You can update DSM safely as long as the build number (e.g., 69057) remains unchanged, without needing an Arc Loader update.
Model & Platform Selection Helper
Platform Functions
General Notes
-
DSM platform doesn’t have to match hardware (e.g., AMD epyc7002 / SA6400 also works on Intel).
-
Non-DT models require PortMap adjustments after changing disk count.
-
Not every model runs on every hardware.
-
⚠️ For HBA, Hardware RAID, and SCSI controllers: SMART values may be inaccurate.
Supported Features (All DSM Platforms)
-
CPU: Intel (yes, with exceptions) / AMD (yes, with exceptions)
-
SSD Cache: Supported ✅
-
Software RAID Controller: ❌
broadwell / broadwellnk (DS3622xs+, RS4021xs+, DS3617xs …)
-
CPU: Up to 16 threads (Broadwell), 24 threads (Broadwellnk)
-
Device Tree: ❌
- Kernel: 4.x
-
HBA Controller: ✅
-
Hardware RAID Controller: ✅
-
SCSI Controller: ✅
-
USB Storage: Internal ✅ | External ✅
-
Intel iGPU: Not supported ❌
-
Nvidia GPU: Community package required 🔵
-
NVMe: Cache (sometimes needs Add-on) ✅ | Storage (Add-on required) 🔵 | System ❌
broadwellnkv2 (SA3410, SA3610, FS3410 …)
-
CPU: Up to 24 threads
-
Device Tree: ✅
- Kernel: 4.x
-
HBA Controller: ✅
-
Hardware RAID Controller: ❌
-
SCSI Controller: ❌
-
USB Storage: Internal ❌ | External ✅
-
Intel iGPU: ❌
-
Nvidia GPU: Community package required 🔵
-
NVMe: Cache ✅ | Storage (Add-on required) 🔵 | System ❌
r1000 / v1000 (DS923+, DS2422+, DS1522+ …)
-
CPU: Up to 16 threads
-
Device Tree: ✅
- Kernel: 4.x
-
HBA Controller: ✅
-
Hardware RAID Controller: ❌
-
SCSI Controller: ❌
-
USB Storage: Internal ❌ | External ✅
-
Intel iGPU: ❌
-
Nvidia GPU: Community package required 🔵
-
NVMe: Cache ✅ | Storage (Add-on required) 🔵 | System ❌
apollolake (DS718+, DS918+, DS1019+ …)
-
CPU: Up to 8 threads
-
Device Tree: ❌
- Kernel: 4.x
-
HBA Controller: ✅
-
Hardware RAID Controller: ✅
-
SCSI Controller: ✅
-
USB Storage: Internal ✅ | External ✅
-
Intel iGPU: Gen 2–9 (Add-on required) 🔵
-
Nvidia GPU: Community package required 🔵
-
NVMe: Cache (sometimes needs Add-on) ✅ | Storage (Add-on required) 🔵 | System ❌
geminilake (DS720+, DS920+, DS423+ …)
-
CPU: Up to 8 threads
-
Device Tree: ✅
- Kernel: 4.x
-
HBA Controller: ✅
-
Hardware RAID Controller: ❌
-
SCSI Controller: ❌
-
USB Storage: Internal ❌ | External ✅
-
Intel iGPU: Gen 2–9 (Add-on required) 🔵
-
Nvidia GPU: Community package required 🔵
-
NVMe: Cache ✅ | Storage (Add-on required) 🔵 | System ❌
denverton (DVA3219, DVA3221, DS2419+ …)
-
CPU: Up to 16 threads (requires FMA3/MOVBE support)
-
Device Tree: ❌
- Kernel: 4.x
-
HBA Controller: ✅
-
Hardware RAID Controller: ✅
-
SCSI Controller: ✅
-
USB Storage: Internal ✅ | External ✅
-
Intel iGPU: ❌
-
Nvidia GPU: Partial native support (community package may be needed) 🔵
-
NVMe: Cache ✅ | Storage (Add-on required) 🔵 | System ❌
epyc7002 (SA6400)
-
CPU: Up to 24 threads (up to 128 with custom kernel)
-
Device Tree: ✅
- Kernel: 5.x
-
HBA Controller: ✅
-
Hardware RAID Controller: ❌
-
SCSI Controller: ❌
-
USB Storage: Internal ❌ | External ✅
-
Intel iGPU: Up to 14th gen ✅
-
Nvidia GPU: Community package required 🔵
-
NVMe: Cache ✅ | Storage (Add-on required) 🔵 | System (Add-on required) 🔵
geminilakenk (DS425+,…)
-
CPU: Up to 8 threads
-
Device Tree: ✅
- Kernel: 5.x
-
HBA Controller: ✅
-
Hardware RAID Controller: ❌
-
SCSI Controller: ❌
-
USB Storage: Internal ❌ | External ✅
-
Intel iGPU: Up to 14th gen ✅
-
Nvidia GPU: Community package required 🔵
-
NVMe: Cache ✅ | Storage (Add-on required) 🔵 | System (Add-on required) 🔵
r1000nk/v1000nk (DS725+,DS925+,…)
-
CPU: Up to 16 threads
-
Device Tree: ✅
- Kernel: 5.x
-
HBA Controller: ✅
-
Hardware RAID Controller: ❌
-
SCSI Controller: ❌
-
USB Storage: Internal ❌ | External ✅
-
Intel iGPU: Up to 14th gen ✅
-
Nvidia GPU: Community package required 🔵
-
NVMe: Cache ✅ | Storage (Add-on required) 🔵 | System (Add-on required) 🔵
Important Settings
Portmap (For Non-DT Models only — SATA Controllers)
-
If you’re unfamiliar with SataPortMap, SataRemap, or AhciRemap, check Sysinfo in Arc to view your drive mapping and select the appropriate option.
-
Avoid leaving empty SATA slots whenever possible — this simplifies configuration.
-
In VMs with SATA controllers, map the loader to
0:0and data drives to consecutive ports like0:1, 0:2, 0:3or1:0, 1:1, 1:2, etc.
Portmap Options
-
SataPortMap (Active Controller Ports):
Automatically removes unused SATA ports after the last active port — typically the best choice. -
SataPortMap (Maximum Controller Ports):
Sets the port map to the controller’s maximum number of ports, regardless of usage. -
SataRemap (Remove Empty Drives):
Removes empty or dummy ports, useful if you see gaps on your controller.
Note: On ESXi, this removes empty slots (like drive 1). All drives must be mapped to the SATA controller — SAS/SCSI ports won’t be accessible. -
AhciRemap (Remove Empty Drives):
Same behavior as SataRemap, specifically for AHCI controllers.
USB Mount (Non-DT Models only)
-
USB Disks internal: enabled — USB drives mount as internal hard drives.
-
USB Disks internal: disabled — USB drives mount as external devices.
Warning:
-
Mixing “USB Disks internal: enabled” with external controllers (HBA, RAID) may cause USB drives to take priority, potentially causing drive count issues.
-
Never create a storage pool spanning multiple ports or types (e.g., don’t mix USB and SATA drives in the same pool). DSM installs on all connected drives automatically; if USB controllers load late, system issues may occur.
Add-on Selection
Only select the add-ons you need!
Some app-specific patches require a reboot after installation to take effect.
To remove an add-on: deselect it, rebuild the loader, and choose Force Reinstall DSM in Grub or Arc Config Mode – Power Menu.
System Add-ons (Always Enabled)
-
disks: Patches Syno Storage Map to match your hardware
-
eudev: Device management daemon for hardware compatibility
-
localrss: Local RSS server for DSM installation
-
misc: Essential utilities
- updatenotify: Alerts users when Arc updates are available
-
wol: Enables Wake on LAN
User Add-ons
-
acpid: ACPI daemon for power management (e.g., power button)
-
allowdowngrade: Enables manual installation of AME 3.1.0, SurveillanceStation 9.2.0, and Videostation 3.1.0 (DSM 7.2.2 only)
-
addincards: Supports M.2 adapter cards like QNAP QM2 or Syno E10Mxx/M2Dxx
-
arcdns: Enables ArcDNS (Dynamic DNS) service
-
bootwait: Ensures all devices are ready before booting continues
-
cpufreqscaling: Enables dynamic CPU frequency scaling (requires reboot after DSM setup)
-
expands: Updates CA certificates & USB IDs
- fancontrol: Control the fanspeeds from inside DSM
-
hdddb: Adds drives to DSM compatibility database
-
hostspatch: Prevents DSM from calling home, protecting Syno services
-
i915: Patches Intel iGPU (Apollo Lake and Gemini Lake only)
-
ledcontrol: Enables LED control for Ugreen systems (SA6400 only)
- notification: You will get Discord or Webhook notifications about the system status
-
nvmecache: Creates NVMe cache (supported models only)
-
nvmevolume: Enables NVMe storage volumes in DSM
-
nvmesystem: Allows DSM installation on NVMe disks (do not use this if other disks should be used / SA6400 only)
-
powersched: Enables time-controlled power supply function
-
sensors: Installs sensor package for CPU and component temperature monitoring
-
storagepanel: Dynamically adjusts DSM display based on installed drives (can be changed in Arc Config Mode – Storage Panel)
-
ups: Forces UPS shutdown during standby
Arc Patch for Loader lower than 2.7.0
- You can still use the Loader with all DSM Functions, except Syno online functions like Active Backup for Business, Advanced Media Engine, QuickConnect and Push Notifications.
- The Arc Patch was removed from the server and will not work with Arc Loader versions older than 2.7.0.
Most features can be activated directly using the AppInstaller in Arc Utils.
Arc Patch for Loader later than 2.7.0
- You don’t need to register your HardwareID for Arc Patch for all 2.7.0 and later release. Only select the Arc Patch while configure the Loader.
- You can still use the Loader with all DSM Functions, except Syno online functions like Active Backup for Business, Advanced Media Engine, QuickConnect and Push Notifications.
Most features can be activated directly using the AppInstaller in Arc Utils.
Arc Online Options for Loader later than 2.7.0
For functions like Online Config Backup or Discord Notification you need to register your HardwareID.
Register Your HardwareID
- Boot into Arc Config Mode.
- Select Online Options.
- Select HardwareID.
- Open https://arc.auxxxilium.tech/ and log in with your Discord account.
- Register the displayed HardwareID
(No personal data such as IP address, name, or logs is stored).